Thursday, June 10, 2021

SPRING IN JERSEY - BROCCOLI SOUP ITALIAN STYLE

SPRING IN JERSEY - BROCCOLI SOUP (ITALIAN STYLE)


Do Italians like
broccoli? Well, what I can say is, all of the ones I have ever known do. My Italian mother, Anna Papiano, loved broccoli, and broccoli rabe. I remember her always waiting for the block on Main Road in Vineland to open, so that she could go and get their broccoli rabe and sausage sandwich, which she loved! 

The famed broccoli rabe and sausage sandwich

You may be wondering, what is the "block?" The "block" is the Vineland auction block, the proper name being, The Vineland Produce Auction. The Vineland Produce Auction is on Main Road in Vineland, NJ. We always went there, pretty much all summer long, as my mom loved the eggplant parmesan sandwiches too. The food was actually made by Tony's lunch and catering, which has a space at the auction block. The Vineland auction block came into being in April of 1930, when a group of farmers got together and created the produce auction. In fact, the auction is still owned and operated by some original members, and many descendants from the founding members. This is a very busy place during the summer months, with farmers bringing in their crops to be auctioned. 

Very early photo of the Vineland Produce Auction......photo credits: Vineland Produce Auction


Later photo of the auction


Business being conducted at the auction, early days

The Vineland Produce Auction is still in operation today, and actually the agricultural prosperity of the area is owed to the efforts of the auction. The auction is the largest produce cooperative that is still operating in the COUNTRY, and it handles 95% of auction sales in southern New Jersey. Something to be proud of for sure. 

Picture of the auction today, but still in the same place

O.K. back to the broccoli. I mentioned broccoli rabe earlier, but rabe is actually a member of the turnip family. Broccoli on the other hand, is a member of the cabbage family. Broccoli is very rich in calcium, iron, phosphorus, potassium, zinc, thiamin, riboflavin and niacin. So when you make up a bowl of this soup, you are not only getting something that tastes delicious, but packed with nutrition. 


What you will need: fresh broccoli (I use 3 or 4 crowns, to 1/2 lb. of pasta) - chicken broth (I use two 32 oz. containers for 1/2 lb. of pasta) - 3 or 4 garlic cloves, peeled - 2 cups of water - 1/2 lb. orzo or ditalini pasta - good quality parmesan

How to Prepare: Clean and chop broccoli. Peel garlic cloves. Put chicken broth and water into a large pot. Add broccoli and garlic cloves. Bring to a boil. Turn heat down and simmer until broccoli is tender. Mash the broccoli and garlic with a potato masher. Bring back to a boil and add pasta. Cook to your desired tenderness for the pasta. That's it. So simple, but so delicious! I like to top mine when it is finished with a drizzle of extra virgin olive oil, which of course is optional, but very good, and you will want to top this with some good quality parmesan. I like to serve this with a good, cold, crisp white wine, like a semi-sweet because it goes so well with the broccoli and garlic. As always, salute' my friends! 


Wednesday, June 2, 2021

SPRING IN JERSEY - HOMEMADE STRAWBERRY ICE CREAM

 HOMEMADE STRAWBERRY ICE CREAM


I am so excited because today we are making the first batch of Jersey strawberry ice cream for the season. Nothing is more exciting than making homemade ice cream. Well, mostly. It is pretty exciting, especially for kids. They get so excited watching the ice cream maker do it's thing, and anticipating that ice cold, creamy, sweet taste that they love! And who doesn't love a bowl of ice cold, creamy, sweet ice cream after dinner for dessert. And there is nothing like making your own. Sure, you can run down to the local store and buy a carton, but you will get additives that you don't really want, it certainly doesn't taste as good, and there is something that just makes you feel so good about making your own. 


For this strawberry ice cream, I used Jersey strawberries of course, but you can use any variety that you want. I love using Jersey strawberries because honestly, I think they are the best! And why are Jersey strawberries better? Because they are juicier and sweeter than the sturdier hybrids grown hardy enough to be shipped around the country. In New Jersey we are fortunate enough to have community strawberry festivals, so that if you really don't want to make your own ice cream, you can find it at one of these festivals, and lots of other Jersey strawberry treats. But I just know, after reading this, you are going to want to try a homemade batch for yourself. 

Now I want to tell you, when you make this ice cream, cut up your strawberries in small quarters so that the each piece of fruit is not too large in the cream. Also, it is very important that you mix the sugar into the strawberries, and then let it set until the sugar dissolves, so that when you mix in the other ingredients, it mixes together well, and the strawberries are thoroughly coated with the sugar. They need to set at least 30 to 60 minutes. Also, you will notice that the ice cream is not pink. The pink color is achieved only if you add food coloring. This is optional. I did not add it to this batch, only because I didn't have it on hand, but a little food coloring is still natural, and the kids love the pink color. But you decide. 


What you will need: 2 1/2 cups of sugar - 5 1/4 cups of heavy cream - 3 cups of fresh strawberries, cut up and mashed slightly - 5 1/4 tsps. of vanilla extract - 2 1/2 cups of half and half - 10 drops of red food coloring, which is totally optional

What to do: Combine the sugar and mashed strawberries and mix well. Let set at least 30 minutes. Mix the strawberry mixture with the rest of the ingredients in a mixing bowl. Then, carefully transfer the ingredients into the ice cream maker's canister. Follow your maker's instructions from there. 


Sunday, May 23, 2021

SPING IN JERSEY - STRAWBERRY CRISP

 STRAWBERRY CRISP


If you like to be outside during those beautiful, not too hot yet, spring days, you pick strawberry farms offer a great way to spend time outdoors, and also gives you something fun to do with the kids, while teaching them about farming and showing them where their food comes from. Plus, you will get a much better price on all of those succulent, red berries.


When I was a child, we basically were outside every day in warm weather, from sun up till sun down. Not like kids today, who are always inside playing on some electronic device. And I think we were the better for it. 

Even as a kid, I loved Jersey strawberries fresh from the fields. Although my father did not grow strawberries, we had an abundance of fields to choose from to pick them. After we would pick what we wanted, my dad would keep working and filling up quarts to sell on the side of the road. This would give him a little extra cash for himself, and I think to bring back the good memories he had of "huckstering" the harvest with his dad. 


So, if you have never picked your own strawberries, you may be wondering how it is done. The first thing to know and remember, is that strawberries DO NOT ripen after being picked. You will want to pick only the ripe ones, mostly red, not green. A little white is okay, but pick them as red as possible. You gently grab the stem just above the strawberry and pinch it off, making sure the hull is still attached to the strawberry. If you pull the strawberry off of the plant, leaving the hull on the plant, the berry becomes damaged and can be subject to bacteria. The damage will greatly reduce the shelf life of the strawberry. Also, if you pull the strawberry off of the plant without pinching the stem, you could damage the plant itself. 

Once you get those berries home, you will want to wash them asap before storing them. This will get rid of any dirt and bacteria that may be on the berries. After washing, make sure you dry them. Also, remove any damaged berries right away. Then, use a paper towel to store your berries to absorb any excess moisture. Never slice your berries until you are ready to use them, store them whole. Fresh berries do not last very long. You can store them in the refrigerator, for probably just several days, that's if they all haven't gotten eaten yet. 😁 Freeze any berries you do not plan to use right away. But just know that freezing does change the texture of the berries. 


When making any fruit crisp, I like to use fresh, in season fruit. But of course you don't have to. But if you use frozen fruit, make sure you thaw the fruit first, then drain it thoroughly, before mixing it with the other ingredients. Now, what you will need for this Strawberry Crisp:

FOR THE FILLING: 6 cups of fresh strawberries, hulled and quartered - 1/4 cup of white sugar - 1 tsp. of vanilla extract - 3 Tbsps. of cornstarch

FOR THE TOPPING: 1 cup of all purpose flour - 3/4 cup of old fashioned oats - 2/3 cup of white sugar - 2/3 cup of packed light brown sugar - 1/2 tsp. of salt - 3/4 tsp. of cinnamon - 1/2 cup (1 stick) of butter, melted


INSTRUCTIONS: Preheat your oven to 350 degrees. Grease a baking dish with butter and set aside. Combine the chopped strawberries and sugar in a large bowl, and mix until the strawberries fully absorb the sugar. Add in the cornstarch and vanilla and stir until all of the strawberries are coated. Pour into your prepared baking dish. In a separate bowl, combine the flour, oats, brown sugar, white sugar, salt and cinnamon. Pour in the melted butter and stir well to combine, making the topping crumbly. Sprinkle the crumb mixture evenly over the top of the strawberries. Bake in preheated oven for 30 to 40 minutes. This crisp is so good served warm, topped with vanilla ice cream. Enjoy my friends. 


Wednesday, April 21, 2021

SPRING IN JERSEY - GRILLED ASPARAGUS CHICKEN SALAD ON SOURDOUGH


It is spring here in Jersey again, 2021. Yes, we made it through the year,  from the spring of 2020, when the pandemic was first announced to us. Thanking God for His goodness to us in bringing us through that year, and praying for those families who lost loved ones due to the pandemic. Sometimes there are things that we will never understand this side of heaven. Ecclesiastes 3:1 tells us, For everything there is a season, and a time for every matter under heaven: a time to be born, and a time to die; a time to plant, and a time to pluck up what is planted. While each time and season may seem random, the underlying significance in the poem is that there is a purpose for everything we experience in our lives. The familiar lines offer a comforting reminder of God's sovereignty. The message in this passage centers on God’s ultimate authority in heaven and on earth. Humans have mastered many things in this world, but some elements of our existence are beyond our control. And giving up control is hard. That is the part we struggle with We cannot conquer time. God is the one who appoints the times of our lives. There is a time for everything, and right now it is time for spring. 

I have talked about spring in Jersey in prior posts, so most of you know, spring is the time for one of my favorite vegetables, asparagus. We have so many good farmers here in south Jersey that grow this woody vegetable. You can pick this up fresh at most farm markets usually starting around the beginning of April. My family eats asparagus as much as we can get it fresh, and love to eat it just steamed with butter, to cooking it with pasta, chicken and whatever else we want to have with it. Asparagus does go very well with chicken, and we also love a good chicken salad sandwich now and again. So recently while making up some chicken salad for my husband to take for lunch, I remembered that it was time for asparagus, and how much I wanted some. So I thought, I have never tried a chicken salad sandwich with asparagus, so now is a good a time as any to make some up. I also thought it would be delicious grilled, and one of my favorite breads for grilling sandwiches is sourdough. Also, I know many will disagree, but for me, I like chicken salad using canned chicken. I just like the texture and the taste. But feel free to use fresh, cooked chicken too, if that is what you normally use. 


What you will need: 1 (12.5 oz.) can of chicken - 1 cup of steamed asparagus, cut in small pieces - 1 tsp. of fresh squeezed lemon juice - 2 Tbsps. of mayonnaise - 4 Tbsps. of sour cream - 1 tsp. of garlic pepper - 1 tsp. of garlic salt - sliced sourdough bread - slices of swiss cheese


What to do: In a bowl, mix lemon juice, sour cream, mayonnaise, garlic pepper and garlic salt. Add the chicken and asparagus. Top a slice of sourdough bread with the salad, and then top with 2 slices of Swiss cheese. Put a Tbsp. of butter into a pan, and grill. Enjoy with a cup of hot soup. 


Friday, March 5, 2021

SPRING IN JERSEY. IRISH COFFEE WITH A TWIST.  A CHOCOLATE TWIST. 


It is the month of March, and this month brings with it the first day of spring. It also brings with it, the traditional celebrating of the patron saint, St. Patrick, or as we call it, St. Patrick's Day. As soon as March rolls around, I start thinking about and making preparations to celebrate St. Patrick's Day. After all, it is the holiday to celebrate the luck of the Irish, and what better way to celebrate, than with an Irish coffee. Of course, our celebrations also include, leprechaun and rainbow crafts with the kids, Shepherds pie, playing Irish music including one of our favorites, Danny Boy, while doing an Irish jig, and playing musical chairs as a family. 😅😅😅 This can get really wild and crazy.


But we also take this celebration and the history of it seriously. And we take our Irish coffee and the making of it seriously. With that being said, I wanted to share with you, the history of the invention of the first Irish coffee.


History has it that the Irish coffee was invented on a dark and stormy night in 1943. According to the Foynes Flying Boat Museum, a Pan Am flight headed to New York was forced to turn around because of bad weather. When it pulled into the Foynes terminal, the cold and tired passengers disembarked. The museum crew wanted to warm up the passengers, so Joe Sheridan, who was a cook at the time at the airport, whipped up the perfect drink to keep the people warm and awake. Americans, or Yanks as they were called, liked their coffee with a little extra cream and a little extra sugar. So Joe whipped up some coffee with a "little extra" cream and sugar and added some Irish whiskey. So the Irish coffee was born. Chef Joe Sheridan was born in Castlederg, Northern Ireland in 1909. After the death of his father, he decided to move to Dublin, and got a job in a restaurant. He applied for the job of chef in 1943 at the airport in Foynes, and so as they say, the rest is Irish history.

There are different brands of Irish whiskey, and the one that you choose depends on the specific tastes you are looking for. Since we love chocolate, and most of my friends love chocolate, I wanted to create an Irish coffee with, well you guessed it, CHOCOLATE! So I had to go in search of the perfect Irish whiskey to pair with my chocolate. I chose The Quietman brand.


The Quietman brand of Irish whiskey is an 8 year old single malt whiskey and is full of flavors that go perfectly with dark chocolate. It opens with floral noes and a hint of orchard fruits before moving on to a palate that is brimming with vanilla and oak. It paired perfectly with my mocha coffee. We found my Irish coffee to be absolutely delicious, and I hope you will as well.


WHAT YOU WILL NEED: 6 oz. (3/4 cup) of dark roast brewed coffee - 1/4 cup light cream, heated in the microwave - 1 oz. or 1 jigger full of The Quietman Irish whiskey - 2 Tbsps. Domino light or dark brown sugar - 1 Tbsp. Hershey's unsweetened cocoa powder

TO MAKE: Brew coffee. Heat up your cream in the microwave, not to boiling, but just enough to heat it up, about 30 seconds. Pour cream into a mug and add the brown sugar, cocoa and whiskey. Stir completely until smooth. If you need to put back in microwave to get rid of cocoa lumps, you can for about 10 to 15 seconds. When coffee is finished brewing, pour 3/4 cup of hot coffee into cream mixture. Stir until smooth and blended. Top with whipped cream. Salute' and Happy St. Patrick's Day. 🍀


Friday, October 2, 2020

SUMMER IN JERSEY - ZUCCHINI - ZUCCHINI AND CHEESE BRUSCHETTA

ZUCCHINI AND CHEESE BRUSCHETTA


How much do you know about zucchini? I asked myself that question, and realized that the answer was very little. So after a little research, I discovered some fun facts. Let me share with you what I found. Zucchini is a summer squash that is in the same family as cucumbers, melons and spaghetti squash. But zucchini is actually a fruit and not a vegetable as most people assume. Surprised? I was too. Squashes actually originated in the Americas, but the green variety, (zucchini), was first developed in Italy in the early 1800's. (Maybe that is why we Italians love it so much.) So how do you identify good zucchini? It should feel firm yet tender with shiny or glossy skin. When you cut into a good zucchini, it should have an almost buttery-like texture, and the flesh should appear slightly yellow, greenish, or white. 

On another page, I emphasized the importance of having an appetizer ready, with cocktails when hosting a dinner party. This bruschetta is perfect for such an occasion. It is light, so it won't fill your guests up too much before dinner. You wouldn't want to work so hard on a special dinner, only for your guests to be too full to eat it!  And of course, you don't have to be having a dinner party to make and enjoy this. If your husband comes home from work ravishing everyday like mine does, from a hard day's work, this is the perfect come home to snack that is light, not too filling, and very healthy. My husband just loves it. This appetizer pairs well with a nice Chardonnay or Pinot Grigio. 

What you will need: Slices of crusty Italian bread - 2 cloves of minced garlic - 1 tsp. of olive oil - 1 medium zucchini, chopped with skin on - 2 small roma tomatoes, cut up in small pieces. - 4 oz. of cheddar cheese, shredded, or any other cheese that you prefer - salt and pepper to taste

To make: In a frying pan, saute the zucchini in the olive oil on medium heat for about 5 minutes. Add the minced garlic and saute another 2 to 3 minutes. Turn off heat and add chopped tomatoes, salt and pepper, and cheese. Stir. As the cheese melts, slice the Italian bread into 1 inch slices and toast. Then top the toasted bread slices with the zucchini mixture. 


Friday, September 18, 2020

SUMMER IN JERSEY -ZUCCHINI -ZUCCHINI CAKE

 ZUCCHINI CAKE


Who wants a piece of zucchini cake? If you ask that question, you may get a lot of turned up noses. But the truth is, zucchini cake is delicious. Zucchini adds moisture to cake like applesauce does. It has a wonderful texture and it tastes great. So shhh, don't tell your children. They will never know its in there. When I make this cake, I like to grate my zucchini by hand. It is so relaxing to grate your vegetables, cheeses and anything else you have to grate this way. At least I find it to be so. Sure, an electric one is faster, but it's definitely not as relaxing. Sometimes the old ways of doing things are more satisfying. Sure, technology is great, but some things are just better left un-changed. Like sitting out on the porch on a summer day shelling peas or pole beans. Especially if you are maybe fortunate enough to be doing this with a parent or grandparent.


Okay, back to the zucchini. In addition to the great taste and texture, zucchini has many health benefits. It is rich in vitamins, minerals, and plant compounds. And, there are only 17 calories in a whole cup. It is rich in antioxidants, contributes to healthy digestion, and reduces blood sugar levels. So go ahead and treat yourself to a slice of this delicious cake. Bon  Appe'tit

What you will need: 2 1/2 cups of flour - 2 cups of sugar - 1 1/2 tsps. of cinnamon - 1 tsp. of salt - 1/2 tsp. of baking powder - 1/2 tsp. of baking soda - 1 cup of vegetable oil - 4 eggs - 2 cups of shredded zucchini - 1/2 cup of chopped walnuts, optional - For Frosting you will need: 3 oz. of cream cheese, softened - 1/4 cup of butter, softened - 1 Tbsp. of milk - 1 tsp. of vanilla - 2 cups of confectioners sugar

To make the cake: In a large bowl, combine flour, sugar, cinnamon, salt, baking powder, and baking soda.


In another bowl, combine oil and eggs thoroughly. Then add to dry ingredients. Mix well. 


Add zucchini and stir by hand, not with the mixer. Pour into a greased 13x9x2 inch pan. Bake at 350 degrees for 30 to 40 minutes, or until knife inserted comes out clean. Cool. 

For the frosting: Beat cream cheese, butter, milk, and vanilla until smooth. Add confectioners sugar and mix well. Frost cake. Sprinkle with nuts if desired. Make sure to store the cake in the refrigerator. 


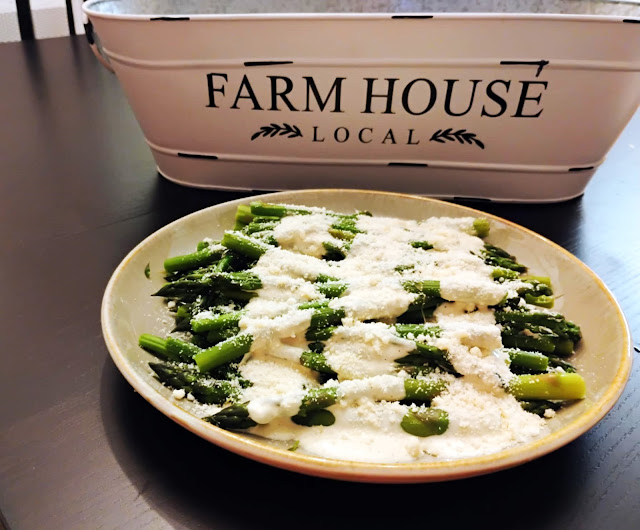
Spring in Jersey - Caesar Asparagus

Caesar Asparagus   It is another spring here in Jersey, and once again, time for our delicious, Jersey asparagus and strawberries, two of my...